
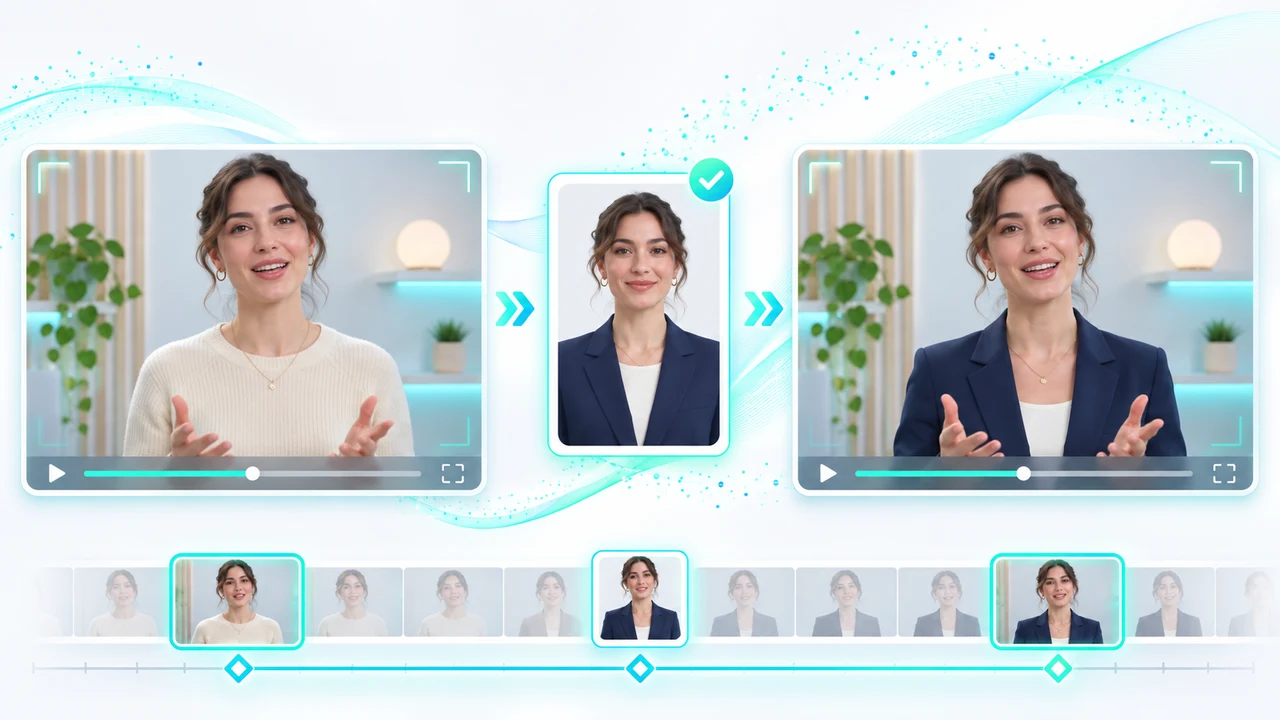
Luma Ray3 Modify tutorial for changing a spokesperson's wardrobe and background while preserving the shot.
What this Luma Ray3 Modify tutorial delivers
Luma Ray3 Modify tutorial readers will transform one approved six-second spokesperson shot without reshooting it: keep the founder's performance, timing, product bottle, and locked camera, while changing a casual jacket to a tailored navy blazer and replacing the background with a softly lit studio wall. The measurable deliverables are one low-resolution proof, one selected high-resolution output when needed, the retained original audio, and a frame-by-frame QA record. This is a controlled video-to-video exercise, not a promise that every identity, hand, product, or logo will survive automatically.
Luma's official Ray3 Modify User Guide documents Character Reference across Modify, Keyframes, and Reference modes, including the Adhere–Reimagine strength control. The official Ray3 Modify FAQs document paid access, supported platforms, file limits, output resolutions, audio retention, and general credit guidance. Both pages are undated and were checked November 13, 2026. The user guide says the feature is available to subscribers; the FAQ specifies all Dream Machine paid subscriptions on web and iOS.
The documented input limit is 100 MB and up to 10 seconds, with common formats including MP4 and MOV. Outputs are listed at 540p, 720p, and 1080p, and Relaxed Mode is available with longer processing time. The FAQ gives a general estimate of 840 credits for five seconds and 1,680 for ten seconds, while Luma's live pricing page now separates video-to-video costs by model and resolution. Treat the signed-in pre-generation total as authoritative. This article did not upload a person or run a generation, so all capability statements are attributed to Luma, not presented as Steven Video Production test results. For a managed hybrid workflow, see AI video production in Vancouver.
Prepare a rights-cleared source, character reference, and change brief
Start with a six-second locked-off shot that you own and have permission to transform. The founder stands waist-up, holds an approved product bottle below chest level, makes one small hand gesture, and delivers a short line. Keep an untouched local master, clean dialogue stem, consent record, product artwork, wardrobe notes, and a still of the approved face. Character Reference is an identity-control input, not permission to upload someone's likeness. Obtain explicit approval for the source video, reference image, intended modification, and commercial use.
Choose a clear, recent portrait with one visible person, neutral lighting, and enough facial detail to identify the approved subject. The input video should avoid cuts, motion blur, hands covering the face, extreme profile turns, or a product crossing the jacket edge. Ray3 Modify can retain original audio according to Luma's FAQ, but preserve the clean source audio separately; a transformed picture still requires lip-sync and dialogue review. Compress only when necessary to stay under 100 MB, and verify that the upload copy has constant playback, correct orientation, and no accidental metadata or confidential background detail.
Write a change brief that separates locked facts from editable appearance. Lock: face identity, skin tone, expression, pose, hand position, bottle shape, approved blank label area, framing, camera movement, timing, and dialogue. Change: jacket colour and cut, plus the wall behind the subject. Use this original instruction: Replace the jacket with a deep navy tailored blazer. Preserve the person's face, hair, skin tone, pose, hand position, product bottle, lip movement, timing, and exact camera framing. Replace only the background with a softly lit Vancouver studio wall in light warm gray. No text, no logo changes, no extra objects, no camera movement. Keep it in production notes so every retry is compared against the same contract.
Use Modify mode and start near Adhere
In Dream Machine, open Modify mode, upload the approved input video, and add the character reference. Luma's current user guide gives this as the basic Input Video + Character Reference route: upload a video of up to ten seconds, add the reference, adjust Modify strength, and submit. The guide says Character Reference replaces or preserves a character while adapting to the input video's style and lighting. For this wardrobe task, however, the instruction should explicitly preserve the existing person rather than inviting a new interpretation. Confirm the displayed model is Ray3 Modify, the duration is correct, and the estimated credits are acceptable before submitting.
Start toward Adhere, not the strongest Reimagine setting. Luma describes Adhere as staying closer to original edges and details, making it appropriate for retexturing, relighting, and recolouring. Moving right toward Reimagine loosens alignment and permits larger character and environment changes. A blazer and wall replacement need some flexibility, but identity, product geometry, and framing matter more than radical styling. Generate the lowest practical proof resolution first. Do not spend on 1080p until the face, hands, bottle, garment edge, and background transition pass at normal speed and frame by frame.
Review the first proof against the original, not from memory. If the jacket changes incompletely but everything locked remains stable, move the strength slightly toward Reimagine and keep the prompt unchanged. If the face, bottle, or camera begins to drift, return toward Adhere. Luma warns that higher Modify Strength can preserve less camera motion and may infer zooms or shifts from the subject's pose. This is why one-variable changes matter. Record strength position, resolution, displayed cost, output ID, and rejection reason. The goal is the weakest setting that completes the approved change, not the most dramatic transformation.
Add keyframes only when the basic pass cannot hold the wardrobe
Use the simpler Modify pass first. If the blazer is correct at the beginning but collapses near the gesture, add keyframe control rather than repeatedly increasing global strength. Luma's documented Input Video + Keyframes + Character Reference workflow starts in Modify mode: upload the input video and character reference, open a keyframe card in the Modify frame editor, enable use character, write the instruction, modify that keyframe, repeat for the next keyframe if needed, then set Modify strength and create. This gives the model clearer endpoints while retaining the original performance as the motion source.
A critical limit appears in Luma's guide: the displayed end frame is actually the frame at 0:05. If the source is longer than five seconds, the transformation still applies to the full video, but the editable end keyframe comes from the five-second mark rather than the true last frame. For this six-second example, inspect both 0:05 and the real final second after generation. Do not assume that a clean keyframe guarantees the last second. Keep the spokesperson's hand away from the jacket edge during that tail whenever a reshoot or source selection is still possible.
Use a short keyframe instruction: Keep cref as the same approved person. In the original image, replace only the casual jacket with a deep navy tailored blazer and replace only the wall with a softly lit warm-gray studio background. Preserve face, pose, hands, bottle, framing, and light direction. Luma's guide says the character reference may be called image1 or cref, while the target keyframe may be called image2 or original image. Those labels are documented prompt references, not a guarantee of perfect identity. If keyframes introduce a new face, changed product, or inconsistent lapels, return to the simpler pass or choose a cleaner source rather than layering more instructions.
Troubleshoot one failure class and protect the credit budget
Name the failed requirement before regenerating. Identity drift: move toward Adhere, use a clearer approved portrait, and remove unnecessary style language. Jacket does not change: move strength slightly right or add one controlled keyframe while keeping identity instructions fixed. Hands or bottle deform: choose a quieter source gesture, reduce strength, or mask the wardrobe change in a conventional composite. Background bends: simplify the requested wall and keep the original perspective. Unexpected zoom: reduce Reimagine strength; Luma explicitly warns that high settings can reinterpret camera motion. Lip or audio mismatch: compare the retained original audio with the new mouth frames and reject the shot if sync no longer holds.
Use one controlled retry per failure class. Do not change the source, reference, prompt, strength, and resolution at the same time. Keep a small log with input filename, reference version, prompt, keyframes, strength, output resolution, displayed credits, output ID, and rejection reason. The FAQ's 840/1,680-credit figures are general guidelines, not a production budget. The current Luma pricing page lists paid plans and model-, action-, duration-, and resolution-dependent charges; check it together with the account's live estimate on the day of work. Relaxed Mode can reduce pressure on fast credits where the account offers it, but Luma warns that processing will be significantly longer.
Set a stop rule before the first generation: one basic proof, one strength adjustment, and at most one keyframe attempt. If identity, hands, product geometry, or lip sync still fails, use the original wardrobe, isolate a safer background replacement, composite a separately approved garment element, or reshoot. A bounded fallback protects client deadlines and factual brand details. For short-form campaign scope, versions, and revision planning beyond the AI pass, review social-media video pricing.
Export, compare, and run brand-shot QA
Download the selected output at the resolution justified by the delivery. Luma documents 540p, 720p, and 1080p for Ray3 Modify; it does not make every resolution equally economical. Use a lower-cost proof for creative approval, then create a 1080p version only after the transformation passes. Confirm the actual downloaded codec, frame rate, dimensions, duration, and audio channels rather than promising a universal file specification. Keep the original source, selected AI output, and clean dialogue stem as separate assets. Add the real product label, logo, legal copy, captions, and music in the local editor, where typography and licensing remain controllable.
Run four review passes. Identity: face shape, skin detail, hairline, ears, blink, teeth, and expression remain the approved person. Continuity: hands, fingers, bottle, label area, blazer seams, lapels, shoulder edges, wall geometry, light direction, camera framing, and motion remain stable from first to last frame. Audio: original dialogue is present, lip closure aligns, no timing shift or unexplained sound appears, and the clean stem still conforms. Delivery: dimensions, frame rate, duration, first and last frame, compression, captions, logo, loudness, filename, usage rights, and approval status match the brief. Review once at normal speed, once frame by frame, and once on a phone.
Archive consent, source master, reference image, change brief, prompt, account and plan note, live credit estimates, strength and keyframe settings, all outputs, rejection reasons, final edit, and approval. The paired Chinese Luma Ray3 Modify tutorial follows the same documented workflow with a Chinese QA checklist. If a brand shot needs identity review, product protection, compositing, sound finishing, platform versions, and client approvals, contact Steven Video Production with the source duration, rights status, intended changes, platforms, deadline, and non-negotiable details.
Frequently Asked Questions
What plan is required for Luma Ray3 Modify?
Luma's current FAQ says Ray3 Modify is included in all Dream Machine paid subscriptions and is available on web and iOS. Verify the signed-in account because plans can change.
How long can a Ray3 Modify input video be?
Luma documents a maximum upload of ten seconds and up to 100 MB, with common formats including MP4 and MOV.
How many credits does Ray3 Modify use?
The Ray3 Modify FAQ gives a general guideline of 840 credits for five seconds and 1,680 for ten seconds. Resolution and current pricing can vary, so use the signed-in pre-generation estimate.
Does Ray3 Modify keep the original audio?
Luma's FAQ says yes. Still preserve the source audio separately and check lip sync, timing, channels, and final export after every transformation.
What is the difference between Adhere and Reimagine?
Adhere follows original edges and details more closely; Reimagine loosens alignment for larger transformations. Higher Reimagine levels may also alter camera motion and background structure.
Can Ray3 Modify change clothing without changing the face?
That is a documented use case for controlled modification, but it is not guaranteed. Start near Adhere, use an approved Character Reference, review every frame, and keep a reshoot or composite fallback.
Ready to start your project?
Get in touch for a free consultation. I typically respond within a few hours.